Reindeer Mask Tutorial - Bonus Pattern Piece
/Can you believe we’re halfway through November, moreover, that it’s only 5 weeks until the Silly Season starts?! I can’t, but that’s mostly because I live in topsy turvy land these days. I’ve been in Australia for 12 years now but I still can’t get used to Christmas and Spring occurring at the same time. I really need those environmental clues of the Northern Hemisphere, the autumn leaves falling, the nights drawing in, the chill in the air, to get me into the christmas spirit. I pine for snow and log fires, sledding and hot chocolate, mittens and hot water bottles.
That’s not to say that I don’t enjoy a hot christmas. It’s a lovely holiday here, full of light and the joys of early summer. Little girls in white dresses, cherries and stone fruit, seafood and cocktails, bright sunshine and cool breezes. We throw open all the doors and lounge around in the garden, enjoying balmy evenings under twinkling fairy lights.
Nonetheless, I do find that it requires more of a conscious effort on my part to make December feel festive, and because I am determined that my children should find it as magical as I remember the holidays from my childhood being I tend to overcompensate by going all out with the decorations, music, christmas craft activities, and, of course, handmade gifts.
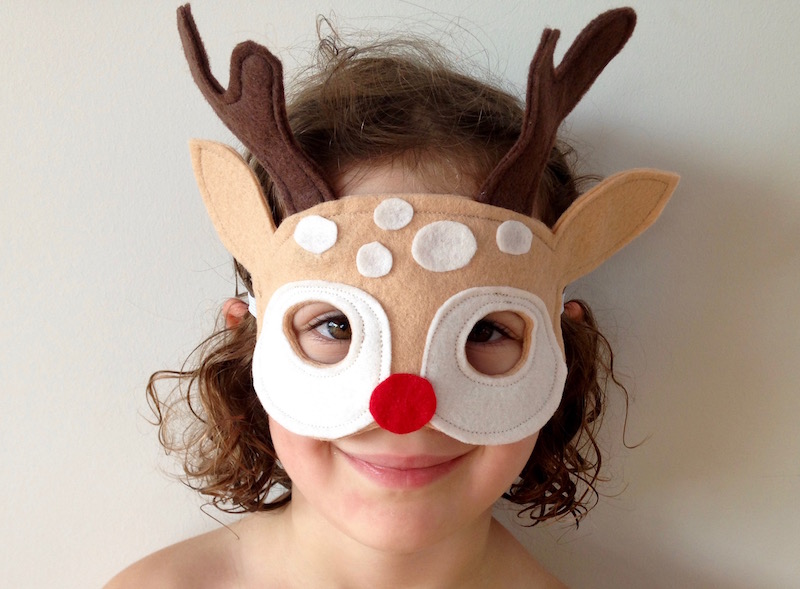
One of my favourite Christmassy things to make are these little Reindeer masks. I’m heading to Swagger Child Design Market this Sunday so I have been busy stocking up on them, and today I’m offering you a free pattern piece so that you can make them too. The cute little fawn in my Woodland Creatures Sewing Pattern can be transformed into a festive Reindeer with the addition of these antlers. Download the pattern extension piece here and scroll down for the tutorial. If you don’t have a copy of the Woodland Creatures PDF and would like one then you can purchase it here.
Tutorial:
1. Download the bonus pattern pieces and print out. Make sure that you set your print settings to 100% or select ‘no scaling’. Measure the 1” square on the page to check that it has printed correctly.
2. Cut out the pattern pieces and pin them to a double layer of felt. Cut around each piece and then sew the two layers together, sewing 5mm (¼”) from the edge.
TIP: For a neater finish and an easier time sewing, draw around your pattern pieces while they are pinned to the felt. You will need a white marker or chalk pen to do this on the dark brown felt. DO NOT cut the felt out.
Instead sew 5mm (1/4”) inside your drawn line and then cut along the white line once you have sewn the two layers together.
Doing it this way stops the felt from shifting as you sew which can be a particular problem when sewing around curves.
3. Sew your fawn mask following instructions on the PDF pattern. When you come to sew the 2 layers of the face together, sandwich each antler between the 2 face layers, positioning each approximately 1cm (½”) from the ear, and letting the base of the antler extend at least 1.5cm / ¾” into the mask. Pin in place before sewing around the face.
As you can see I use the same technique for sewing all of my masks i.e. I sew before cutting wherever possible - It's quicker and gives a much nicer finish!
Well, that's it. You're done!
Happy Holidays.


