
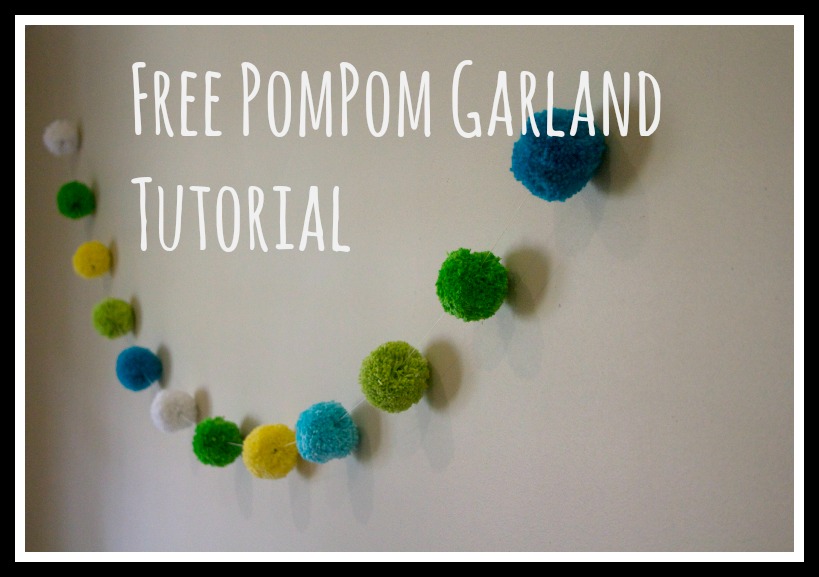
Free Pompom Garland Tutorial
/
Pompoms. I love pompoms. They're like little balls of woolly goodness. Even just the name is awesome. Pompoms. Say it with me. Pompoms. Tell me you don't love it!
Pompoms are great fun to make and so easy. It’s the sort of thing that should be done curled up on the sofa with a blanket and a cup of tea. If you have older children they will love making these so get them involved too!
You can use pompoms to make scarfs; you can use them to decorate stuff; and other stuff. Hell I don't know. So they might not be very useful but they are just so damn awesome that you won't be able to stop yourself once you get started making them. I'm no knitter but I'd probably knit a (very bad) hat just so that I'd have somewhere to stick my pom pom. My sister and I used to spend whole days making these during the school holidays. I always thought a pompom ball pool would be pretty amazing.
Anyway, just in case you get hooked on making them and need something to do with them, here's a little tutorial for a pompom garland.

First things first - Make your Pompoms:
You will need:
- Wool in the colour(s) of your choice
- Light - medium weight card
1. Print the template provided. Be sure to select 'Actual Size' or set scaling to 'None' in your print settings.
2. Paste the template to the side of a cereal box or some other card of a similar thickness and cut them out. Place two rings together, one on top of the other.
3. Take a long length of wool (several metres), fold it double and tie it onto your cardboard at one end. Begin to wind the wool around your template, passing it through the hole in the middle, over the edge and back through the middle. Work your way all around the template, creating a second layer of wool once you get back to the point where you started. You can actually fold your length of wool 4 or 8 times before you start wrapping it around the template, the more times you fold it the quicker your pompom will grow.
3. When you come to the end of your piece of wool, tuck it under a neighbouring strand to keep it in place.
4. Continue like this, tying on a new piece of wool each time you run out, until the hole in the centre of the card is almost closed and you can’t pull anymore wool through it. It should now be like a huge woolly doughnut.
5. Choose a point on the outer edge of your pom pom and part the wool so that you can see the cardboard templates. Insert your scissors between the two layers of cardboard and cut through the wool all the way around the edge.

7. Take a length of wool and slide it between your two pieces of cardboard. Wrap it around a few times, pulling tightly to secure your pom pom and tie off.
TIP: if you are going to be sewing your pom pom to a hat, scarf or other item leave these ends long.
8. Tear through your cardboard templates and remove them from the pom pom. You should have a nice firm ball of wool.
9. Trim the pom pom, cutting off any longer pieces of wool so that you have a nice round ball. This is my favourite bit. It's very satisfying; it's like shearing a sheep (or so I would imagine, not ever having actually sheared a sheep...)
Make the Garland:
You will need:
- 10 or more pompoms
- 3 yards + (2.7m +) extra strong thread
- Buttons or beads
- Large needle
1. Pass your needle through the first button or bead and pull the thread through leaving a 1 yard / 1 metre tail. Tie a knot around the button or bead to hold it in place on the thread.
2. Use your fingers to find the centre of one of the pompoms and push your needle through it. Pull the pompom along the thread and slide it right down onto the button / bead. The button or bead should be completely buried in your pompom. Thread another button / bead onto your string and push it right down onto the pompom. Tie it in place to keep the pompom from sliding around on your thread. Make sure that the button / bead is hidden in the pompom.
3. Repeat approximately 6" (15cm) along the thread to secure the next pompom to the string.
4. Continue in this way until your garland is the desired length (or until you have used up all of your pompoms!) Then hang it up and enjoy!


