Gumnut Dress Pattern Giveaway

I love my Gumnut dress

I love Instagram.  I love the way we use it to highlight the beautiful parts of ordinary days.  I love the way that it makes me view the world differently.  And most of all I love this wonderful community that I have discovered, of people who love to sew as much as I do.  I think there must be few industries in the world which are so positive, supportive and caring as this one that I feel so lucky to be part of.  

For me sewing is about more than just being creative.  It's about slowing down, stepping away from the culture of frantic consumerism that has become the norm and practicing mindfullness.  I believe that taking time to make something by hand, pouring love and effort into creating something unique is the ultimate antidote to everything that has gone wrong with our modern society. 

I am so very grateful to have discovered the joy that sewing brings and to be on the road to making it a much bigger part of my life, that I want to give something back.  I want to say thank you to all the people who inspire and encourage this passion in me and I want to begin my new venture with a wonderful bang!

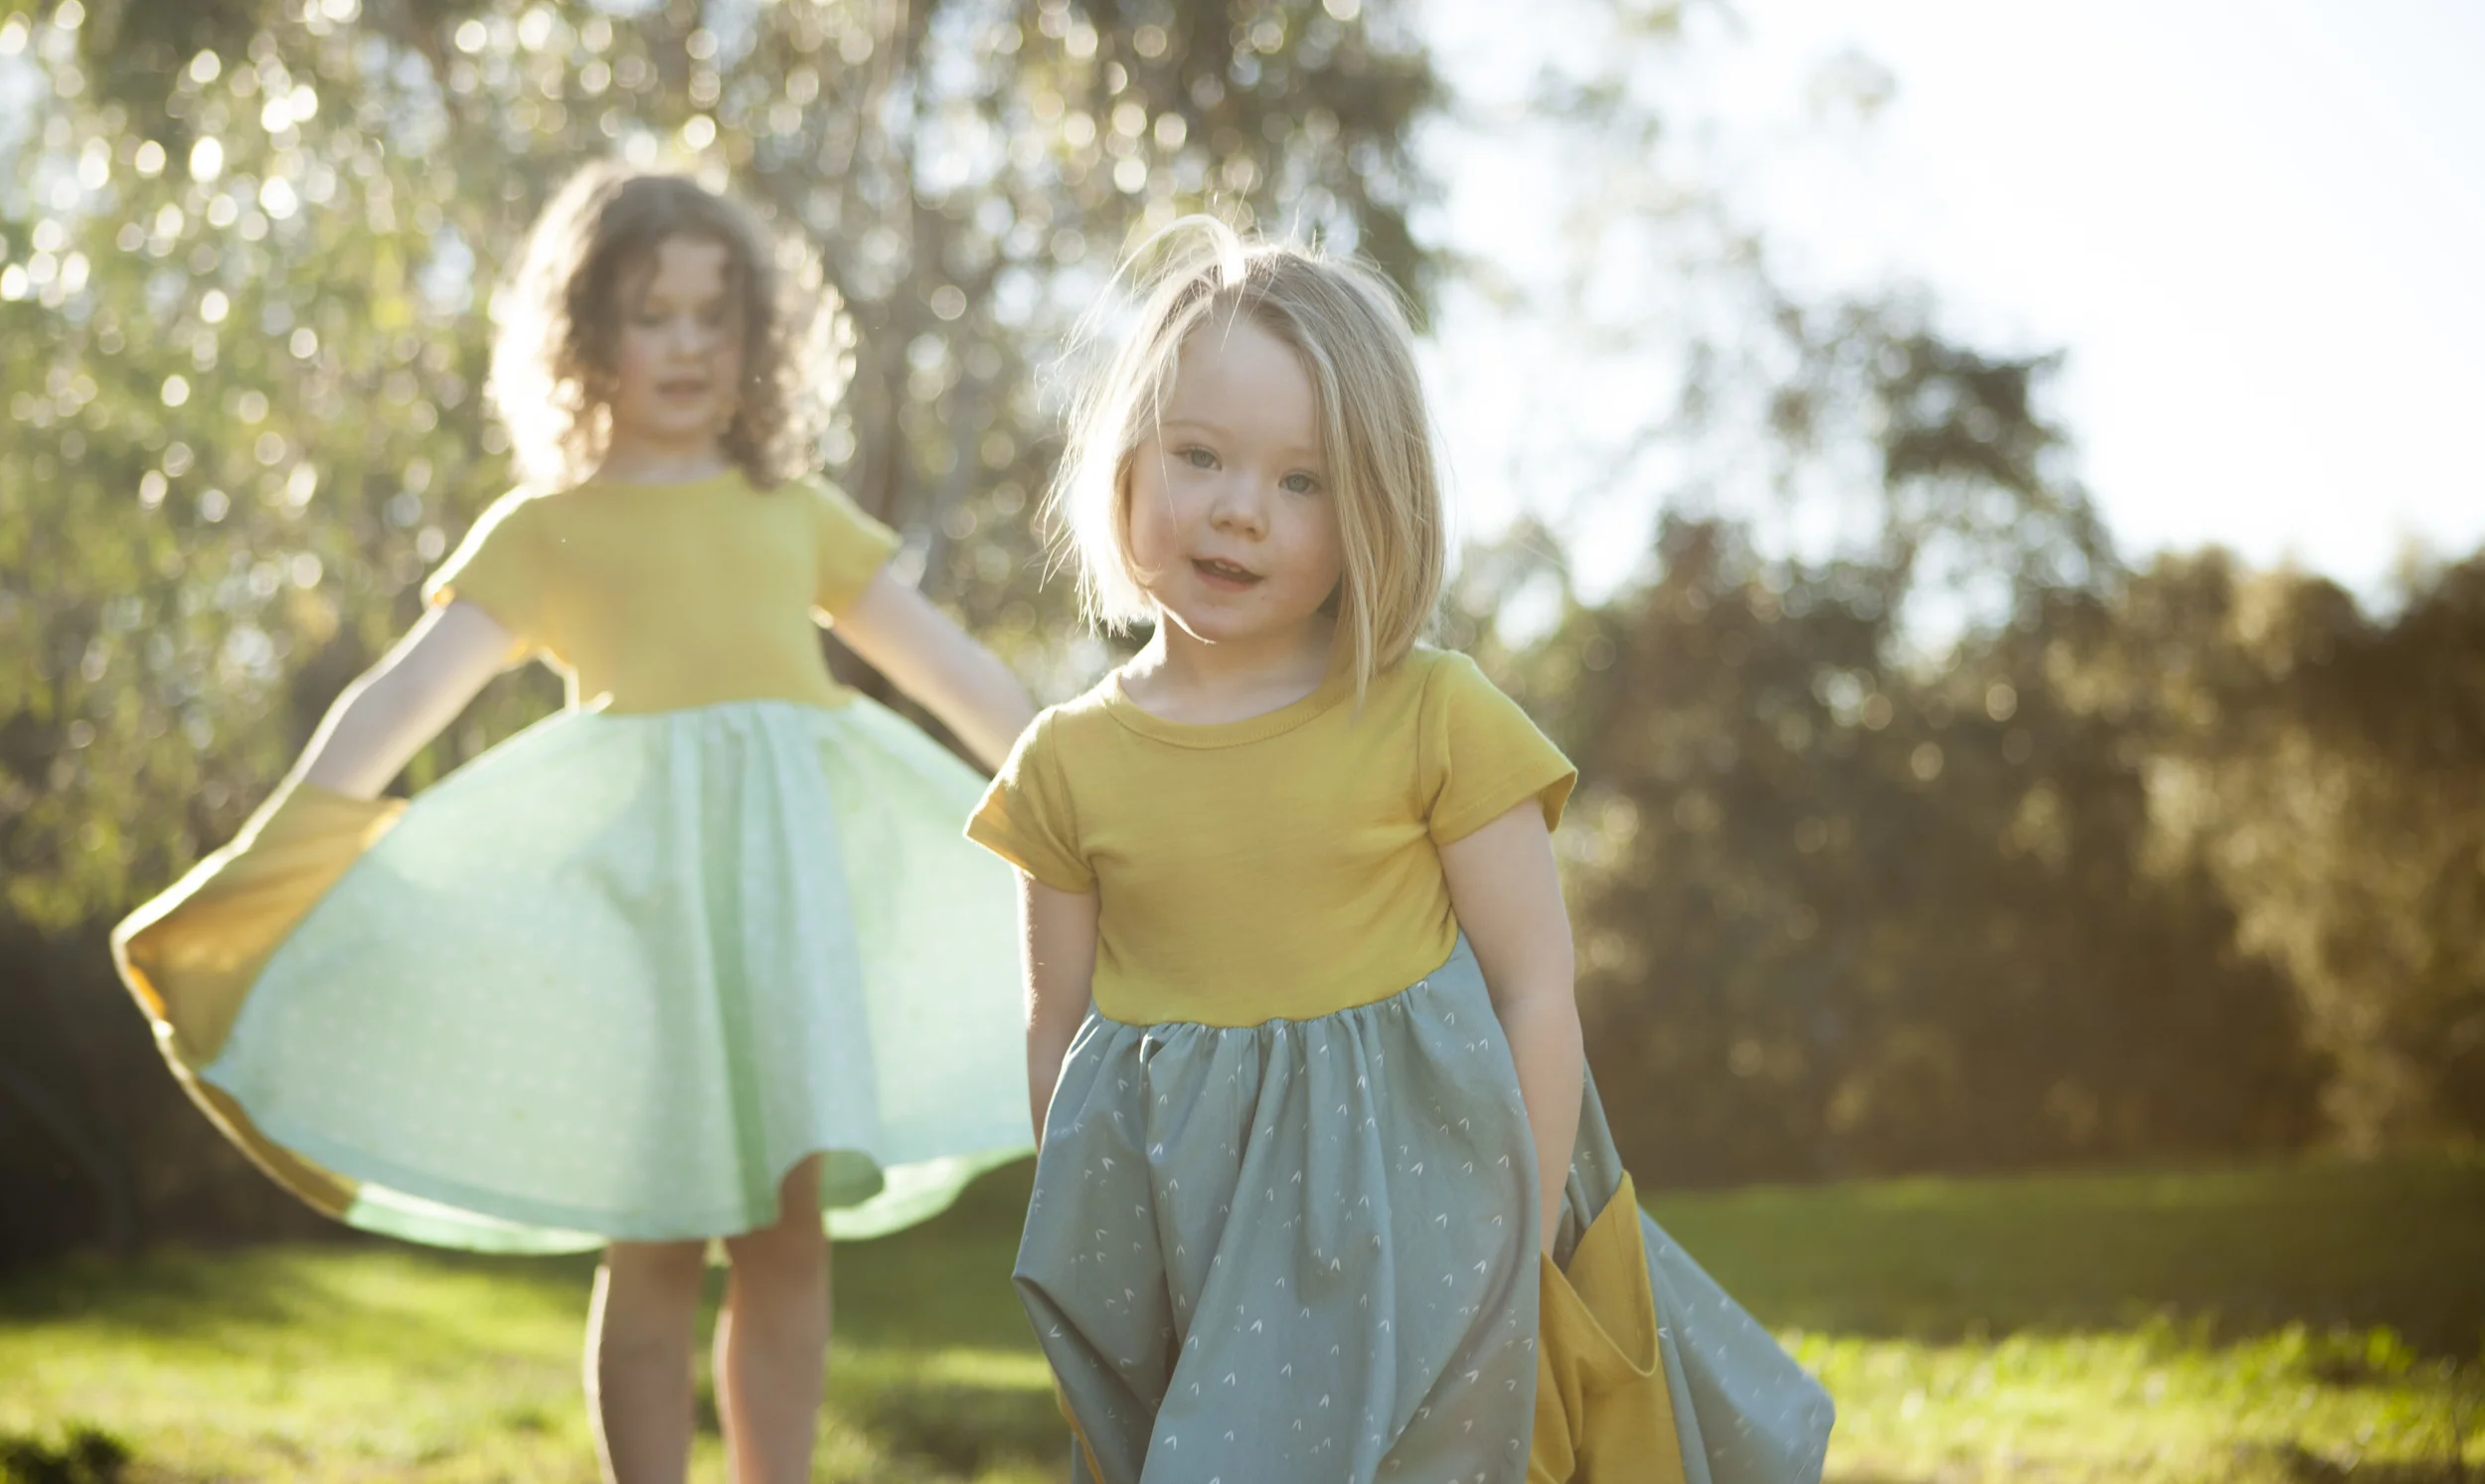
The Gumnut dress is the first graded dress pattern that I've designed and developed.  It has taken a lot of my time and effort and love and dedication to get to this point.  It feels a little like my baby - I love it dearly and I'm so proud of it and I am a little afraid of letting it out into the world alone.  So this has been a difficult decision for me and it's a little bit scary too, but I have noticed that the scary decisions are often the right ones don't you think?

I expect that by this point you're thinking 'Enough already! What ARE you on about?!' It's a fair question.  I've decided that I'm going to give this pattern away for free.  Totally free to anyone who registers their interest before the pattern release: 9pm Australian Eastern Standard time on the 6th May (7am EST if you're in the States.) In other words you have 24 hours.  When the pattern is released I will send you a free copy.

This is the first pattern that I've put out there for sale so I'm hoping that you will all act as reviewers for me.  I know there are a lot of Indie designers out there and I'm well aware that the quality can vary dramatically.  You don't know me yet and I don't know you so I want you to know that my patterns are good.  That they work. That they are easy to follow. That the end products are great.  I want to earn your trust.

All I ask in return is that you don't distribute your free copy amongst your friends and family.  I rely on your honesty to protect my business.  Knowing what a great community we have I feel confident that the majority of you will respect this.  If you love the dress and the pattern please tell people about it.  Most of all I just hope that you have fun making this and that the little one you are sewing for loves it!


UPDATE:  The free dress pattern giveaway is now closed.  Sorry if you missed out.  Why not subscribe to my newsletter anyway (link in the side bar) then you'll always be the first to know when there's a special offer.

If you'd like another chance to win a free copy then you can enter my 'Sew Mama Sew Giveaway Day' promotion.  See previous blog post for details.


Gumnut Dress Photo Shoot

Gumnut Dress Photo Shoot
Gumnut Dress Willow and Stitch

We had such a beautiful afternoon down by the creek yesterday.  It was one of those heavenly days where the sunbeams turn everything gold.

The girls had so much fun playing in the bush.  Running, jumping, twirling, turning their skirts into butterfly wings, feeling like princesses and playing like tomboys! What could be better?

Pattern release is set for Wednesday 6th May and I can't wait!

Gumnut Dress Pattern Testers Wanted!

Gumnut Dress
Gumnut Dress

My Gumnut dress pattern is finally finished! I'm so pleased with how it's turned out and I really love this Cotton and Steel with stripes combo.  I'm also very happy about how much Ella loves it, the knit top makes it super comfy, it has huge pockets for storing treasures and a skirt that's perfect for twirling!

I've spent the weekend perfecting and testing and now it's your turn!  I need pattern testers for all sizes from 1 to 8 years.  You don't need to be an expert to pattern test, confident beginners should be able to sew this pattern.  There's a pretty short deadline on this one, testers need to have completed that pattern and submitted their feedback by Friday 1st May.  All testers will receive free copies of the finished pattern and my eternal gratitude for their help!

If you're interested and able to meet the deadline then please either email me at willowandstitchdesign@gmail.com or enter your details below.  Be sure to hit 'Submit'

UPDATE:  Applications for pattern testing are now closed.  I'm hoping to release the Gumnut Dress Pattern in the first week of May and I've got a MASSIVE givaway planned so if you'd like to be updated enter your details below:

Gumnut Dress
Gumnut Dress


Kids Clothes Week - Spider Tee for the Boy

Spider Tee

I found this amazing spider web fabric at my local fabric clearance store this week and thought it would be just perfect for the Kids Clothes Week Wild Things theme.  The pattern is modified from an Ottobre pattern, I just added a waist band to it to make it more like a sweater than a tee.  The neckline turned out a little wide but it just adds to the slouchy, comfy feel I think. 

Needless to say it was a big hit with Jacob who beamed when he saw it.  It immediately captured his imagination - he instantly turned into Spiderman - climbing, jumping, swinging, shooting webs from his wrists! Look at that happy face!

There were so many more things that wanted to get done during this Kids Clothes Week but as always there simply weren't enough hours in the day and I decided that I really needed to focus on one very special project instead! Details coming right up...

Kids Clothes Week - Woodland Geranium Dress

Geranium dress
Geranium dress
Geranium dress

I made this lovely Geranium dress for Ella as part of Kids Clothes Week.  This beautiful fabric is Timber Valley in Coral from the Brambleberry Ridge collection by Violet Craft.  I love the little deers, foxes and birds and the metallic gold trees, it's just gorgeous.  And I always love sewing geranium dresses.  I haven't made the pleated skirt version before so I thought I'd give that a go this time.  I finished the back with some lovely shell buttons which actually came from an old necklace of mine that broke - love a good upcycle!

I didn't want to waste any of this lovely fabric so I sewed a miniature version for Ella's doll, Molly.  I love this doll - the pattern is the Little Amigo Doll from Meg McElwee's book, Growing Up Sew Liberated.  I didn't know when I made the doll that Ella's hair would end up just as crazy as Molly's - they are like peas in a pod now!

Geranium dress


Friday's Tee

I was in need of something simple today, because I've not been feeling well and I wanted to still have time this evening to sit on the sofa, eat nachos and drink wine - Because it's Friday dammit and I need a REST!

 So, today I made a Kirsten Kimono Tee from Maria Denmark.  It's a free pattern and you can find the link here

I'm actually really pleased with this.  It's sooo comfy and even though it's so simple I still love the style.  One thing that I hadn't anticipated was how hard it is to sew with black!  It's been a pretty grey day here so the light wasn't that great, but i just found it really hard to SEE anything!  I've never really sewn with black fabric before because until now I have mostly sewn clothes for the children and I don't tend to dress them in black.

I think this is probably the cheapest item of clothing I have ever made - pattern was free and I got about 4 metres of this fabric for $2 because it had a couple of rips in it - there was still heaps of lovely useable fabric though - I'll get another couple of tees out of it and probably some leggings too :)

Sorry about the terrible photos - I forgot to take them until it was almost dark and it was raining to boot! Still, gotta have evidence right..? 

This tee is going to be another wardrobe staple and I'm already planning to make more!

Thursday Tee (or another Tuesday Tee)

I haven't been feeling all that well today so I thought I wouldn't try to stretch myself too far. So instead of coming up with a new Tee, I went and made another Tuesday Tee. I couldn't help myself, I just love this Tee so much it's so comfy and fits really well.  I did however manage to get the pattern up for you this time.  You can find the link here.

Please note that this pattern is untested by anyone except me and is one size (small) only.  If you make this Tee I would be very grateful of any feedback so that I can improve the pattern for the next person.

For this second Tuesday Tee I sewed the Hems with a zigzag stitch instead of a twin needle. Let's say that I did this to show you that it looks just as good and not because I couldn't be bothered to fit the twin needle and wind another bobbing of lemon coloured thread! Okay?!

I also topstitched the back seam this time.  I think it looks great with the added detail.

Wednesday Tee

Wednesday Tee

Another day, another Tee.  This is Wednesday's offering.  A symmetrical hem line, simple sleeves, loose fit and wide neckline that slips off the shoulder.

I'm pretty pleased with this one.  The fabric (a Gorman designer remnant) is soooo soft and so comfy that wearing this tee actually feels like wearing pyjamas!  On the down side i think the fabric is a little light weight for this style - It seems to cling a bit and doesn't quite hang properly - It was clinging a little when we took these photos (although that could just have been because I was wearing a tank top under it..) Either way, I'm pretty sure that I'm going to be wearing this one a LOT especially as the days get cooler over here on the other side of the world.

I also have a pattern for this Tee but didn't manage to get the photos taken for a tutorial so I'll add that this weekend if I can manage it.  It does mean i'll have to make another... shucks! 

It wouldn't be right not to leave you with a couple of photos of one of my cheeky little photo bombers!

Tuesday Tee

Tuesday Tee
Tuesday Tee
Tuesday Tee
Tuesday Tee Back

This is a lovely relaxed fit tee.  It is a dolman tee with fitted elbow length sleeves and it tapers towards the waist.  The fabric is cut on the bias and the back is blocked to make a nice seam detail across the back.

 You will need:

  • 1.4m of 140cm wide knit fabric
  • Matching thread
  • Twin Needle (optional)
  • Rotary Cutter and Cutting Mat (optional)

I have used my overlocker to sew this Tee but you can easily sew this using your sewing machine.  See my ‘Beginners Guide to Sewing with Knits’ if you need more guidance. It has a lovely scooped neckline, just wide enough to fall off the shoulder occasionally but not wide enough to gape.

As before please note that this pattern is completely untested by anyone except for me and the pattern pieces are in one size only (small).  Click on the image below to download the pattern pieces.

Sewing Instructions:

Print and Cut Pattern Pieces.

Click the image above to download the pattern pieces.  When printing be sure to print at 100% or set scaling to 'None'.  There is a 1" test square on page 1 which you can measure to check that your pattern has printed at the correct size.  Pattern pieces can be printed on A4 or US letter paper.  Once printed they will need to be trimmed along the dotted lines and taped together.  Do this following the diagram on page 3 and matching notches.

Pattern pieces are to be cut on the bias.  Take your 1.4m by 1.4m piece of fabric and bring 2 diagonal corners towards each other, folding the fabric to form a triangle.  The fold will run along the longest edge of the triangle.  Place your pattern pieces on this fold, pin in place and cut (ideally with a rotary cutter and cutting mat to prevent stretching of the fabric as you cut.)

Join Back pieces:

Take the upper and lower back pieces and place right sides together, matching notches.  Pin together along the long edge and join with a 1cm seam. Press seam towards neckline.  There is no need to use a zigzag stitch here, a simple straight stitch will do as the fit here is loose.

Tuesday Tee
Tuesday Tee
Tuesday Tee

Join Shoulders:

Lay tee front and back on top of one another, with right sides together.  Match and pin shoulder seams and then join with a 1cm seam.  Once again, straight seams will do.  Press seams towards the Tee back.

Hem Sleeves and bottom of Tee.

Press 1cm to the wrong side, then fold over again, pressing another 2cm to the wrong side.  Pin in place.  Sew hems using a twin needle or a zigzag stitch, sewing 1.5cm from the hemline.

IMG_2518.jpg
Tuesday Tee

Sew Side Seams:

With right sides together, align side and underarm seams, matching hems.  Pin in place and join, using a single seam.  Begin at the ends of the arms and sew towards the bottom hem.

Tuesday Tee

Finish the neckline.

I'm afraid that the method i've used for finishing the neckline is very unscientific, which bothers me greatly - being an actual real life scientist.  I'll come up with better instructions and update this soon.  But, for the time being, cut a strip 4 cm wide and approximately 100cm long. 

With right sides together and matching raw edges, position one end of your binding approximately 5cm past the mid point of the centre back of the neckline. Join with a 1cm seam sewing right around the neckline, stretching the neck binding slightly as you go. Stop 5 - 10 cm from where you started your line of stitching.

IMG_2523.jpg

Lay the ends of the neck binding flat and trim them so that they overlap by 2cm.

Align the ends of the binding so that the right sides are together and join with a 1cm seam.  Take care to keep the rest of the Tee out of the way of your stitches.

Press seam open, pressing binding flat against the neckline as you do.  Complete the seam that joins the binding to the neckline, sewing across the seam and the seam allowance and backstitching at the start and end of your stitches to secure them.

Press the binding to the right side.

Using a steam iron, press 0.5cm of the raw edge of the neck binding to the wrong side.  Press another 1.5cm to the wrong side and pin in place.  The neck binding should extend slightly past the seamline.  Take extra care to make sure that you have done this accurately.  You will be glad you did! Pin in place.

Working from the right side of your Tee, 'stitch in the ditch' right around the neckline.  Your stitching should be almost invisible from the front and should catch the neck binding on the back:

And that's it!  We're done.  That's 2 of 7 Tees complete and i'm already beginning to feel that i might have bitten off more than I can chew with this challenge I've set myself! Oh well, I do love a challenge, but right now I'm off to have a long, hot shower, put on my PJs and snuggle up on the sofa to watch GAME OF THRONES!!! Whoop!

Goodnight. x