It's Giveaway Day!

Sew mama Sew giveaway day
Sew Mama Sew giveaway day
sew mama sew giveaway day

Rooooaaar!  I'm so excited!  It's Sew Mama Sew's annual Giveaway day!  I love Giveaway day and This time I have 2 prizes up for grabs.  Winners can take their pick from any of my PDF felt mask sewing patterns.  They are perfect stocking fillers and make a wonderfully quick and easy last minute handmade birthday prezzie (I should know - pretty much all of the kids in my daughter's class got these for their birthdays this year...!)

Enter using the Rafflecopter below.  Entries close at midnight Sunday American Eastern time. Winners will be notified via email.  

Follow @willow_and_stitch on Instagram HERE:

Great! Good luck!  

If you don't win, want to peruse all my sewing patterns or simply can't wait then you can head over to my Etsy shop to take a look.

Now head back to Sew Mama Sew to enter more wonderful competitions!

Reindeer Mask Tutorial - Bonus Pattern Piece

Reindeer Mask Tutorial

Can you believe we’re halfway through November, moreover, that it’s only 5 weeks until the Silly Season starts?!  I can’t, but that’s mostly because I live in topsy turvy land these days.  I’ve been in Australia for 12 years now but I still can’t get used to Christmas and Spring occurring at the same time.  I really need those environmental clues of the Northern Hemisphere, the autumn leaves falling, the nights drawing in, the chill in the air, to get me into the christmas spirit.  I pine for snow and log fires, sledding and hot chocolate, mittens and hot water bottles.

That’s not to say that I don’t enjoy a hot christmas.  It’s a lovely holiday here, full of light and the joys of early summer.  Little girls in white dresses, cherries and stone fruit, seafood and cocktails, bright sunshine and cool breezes.  We throw open all the doors and lounge around in the garden, enjoying balmy evenings under twinkling fairy lights.

Nonetheless, I do find that it requires more of a conscious effort on my part to make December feel festive, and because I am determined that my children should find it as magical as I remember the holidays from my childhood being I tend to overcompensate by going all out with the decorations, music, christmas craft activities, and, of course, handmade gifts.

One of my favourite Christmassy things to make are these little Reindeer masks. I’m heading to Swagger Child Design Market this Sunday so I have been busy stocking up on them, and today I’m offering you a free pattern piece so that you can make them too.  The cute little fawn in my Woodland Creatures Sewing Pattern can be transformed into a festive Reindeer with the addition of these antlers.  Download the pattern extension piece here and scroll down for the tutorial.  If you don’t have a copy of the Woodland Creatures PDF and would like one then you can purchase it here.

Tutorial:

1. Download the bonus pattern pieces and print out.  Make sure that you set your print settings to 100% or select ‘no scaling’.  Measure the 1” square on the page to check that it has printed correctly.

2. Cut out the pattern pieces and pin them to a double layer of felt.  Cut around each piece and then sew the two layers together, sewing 5mm (¼”) from the edge.

Reindeer Mask

TIP:  For a neater finish and an easier time sewing, draw around your pattern pieces while they are pinned to the felt.  You will need a white marker or chalk pen to do this on the dark brown felt.  DO NOT cut the felt out.

Instead sew 5mm (1/4”) inside your drawn line and then cut along the white line once you have sewn the two layers together.

Doing it this way stops the felt from shifting as you sew which can be a particular problem when sewing around curves.

Reindeer Mask Tutorial

3. Sew your fawn mask following instructions on the PDF pattern.  When you come to sew the 2 layers of the face together, sandwich each antler between the 2 face layers, positioning each approximately 1cm (½”) from the ear, and letting the base of the antler extend at least 1.5cm / ¾” into the mask.  Pin in place before sewing around the face.

Reindeer Mask

As you can see I use the same technique for sewing all of my masks i.e. I sew before cutting wherever possible - It's quicker and gives a much nicer finish!

Well, that's it.  You're done!

Happy Holidays.

Reindeer Mask

Lessons learned from mass production and selling wholesale!

Owls Masks for Seed by Willow and Stitch

Yet again I find myself wanting to start a blog post by saying ‘It’s been rather quiet around here recently’ and while that might be true of my little blog - it most certainly isn’t true of my life in general; It has been BONKERS around here recently!

Masks for Seed photoshoot by Willow and Stitch
Tails for Seed photoshoot by Willow and Stitch

September seems to have passed in a blur of felty activity.  It all started innocently enough - with an enquiry from stylist Tamara Maynes asking whether I could design and make a few masks, tails and ears for a photo shoot she was doing for Seed Kids in a few days time.  I love a challenge, particularly when it involves creating some new designs so I was happy to do it.  I was expecting that the campaign might help my business by advertising my masks on a large scale and being associated with a big brand - what I wasn’t expecting was to get a call from Seed a week later, asking whether I could make 500 masks for them to stock in stores to complement the campaign!  

So. Many. Birds.

So. Many. Birds.

I make these dress up masks in my ‘spare’ (ha!) time so I wasn’t sure whether it would be possible to make so many in such a short time frame (I had 3-4 weeks) or even whether I wanted to commit to such a large project, but my husband persuaded me that I ought to do it; ‘I’ll help’ he said (and don’t you worry, I most certainly held him to it!)  I was expecting him to regret his offer (he generally dislikes doing anything that might be classified as ‘arts and crafts’ - weird really as he’s actually very artistic) but he seemed to rather enjoy it, and he certainly has a better appreciation for the work I do now!

All the pandas

All the pandas

Panda Masks for Seed by Willow and Stitch

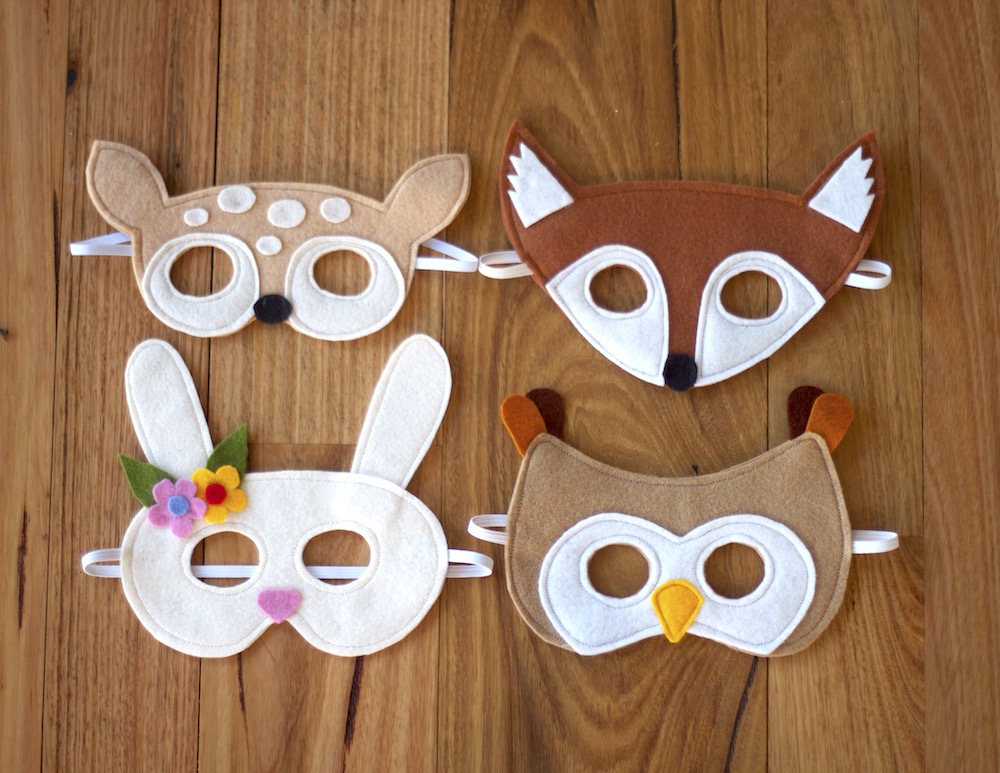
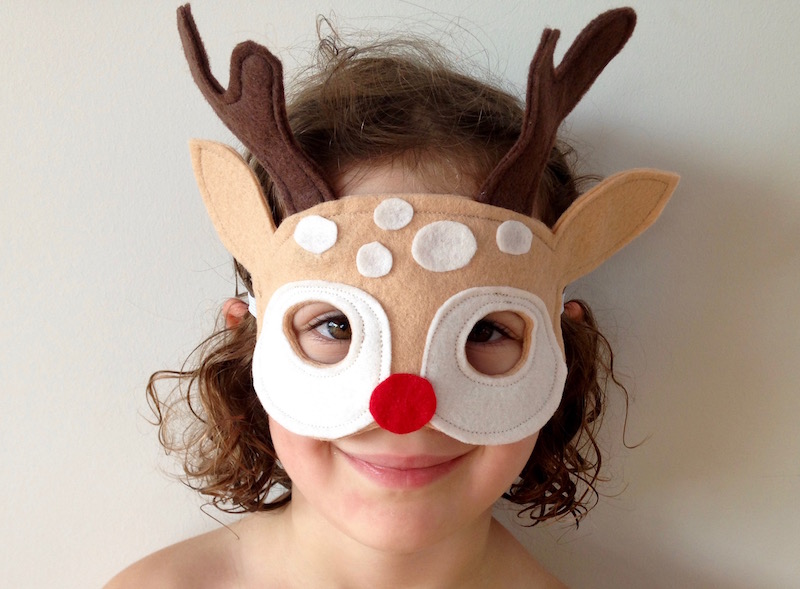
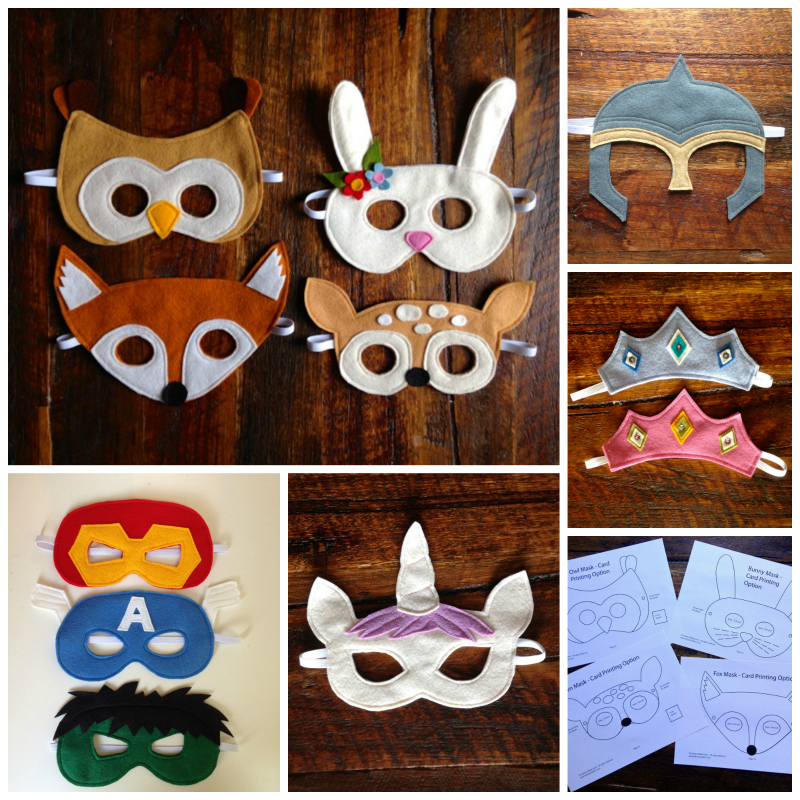
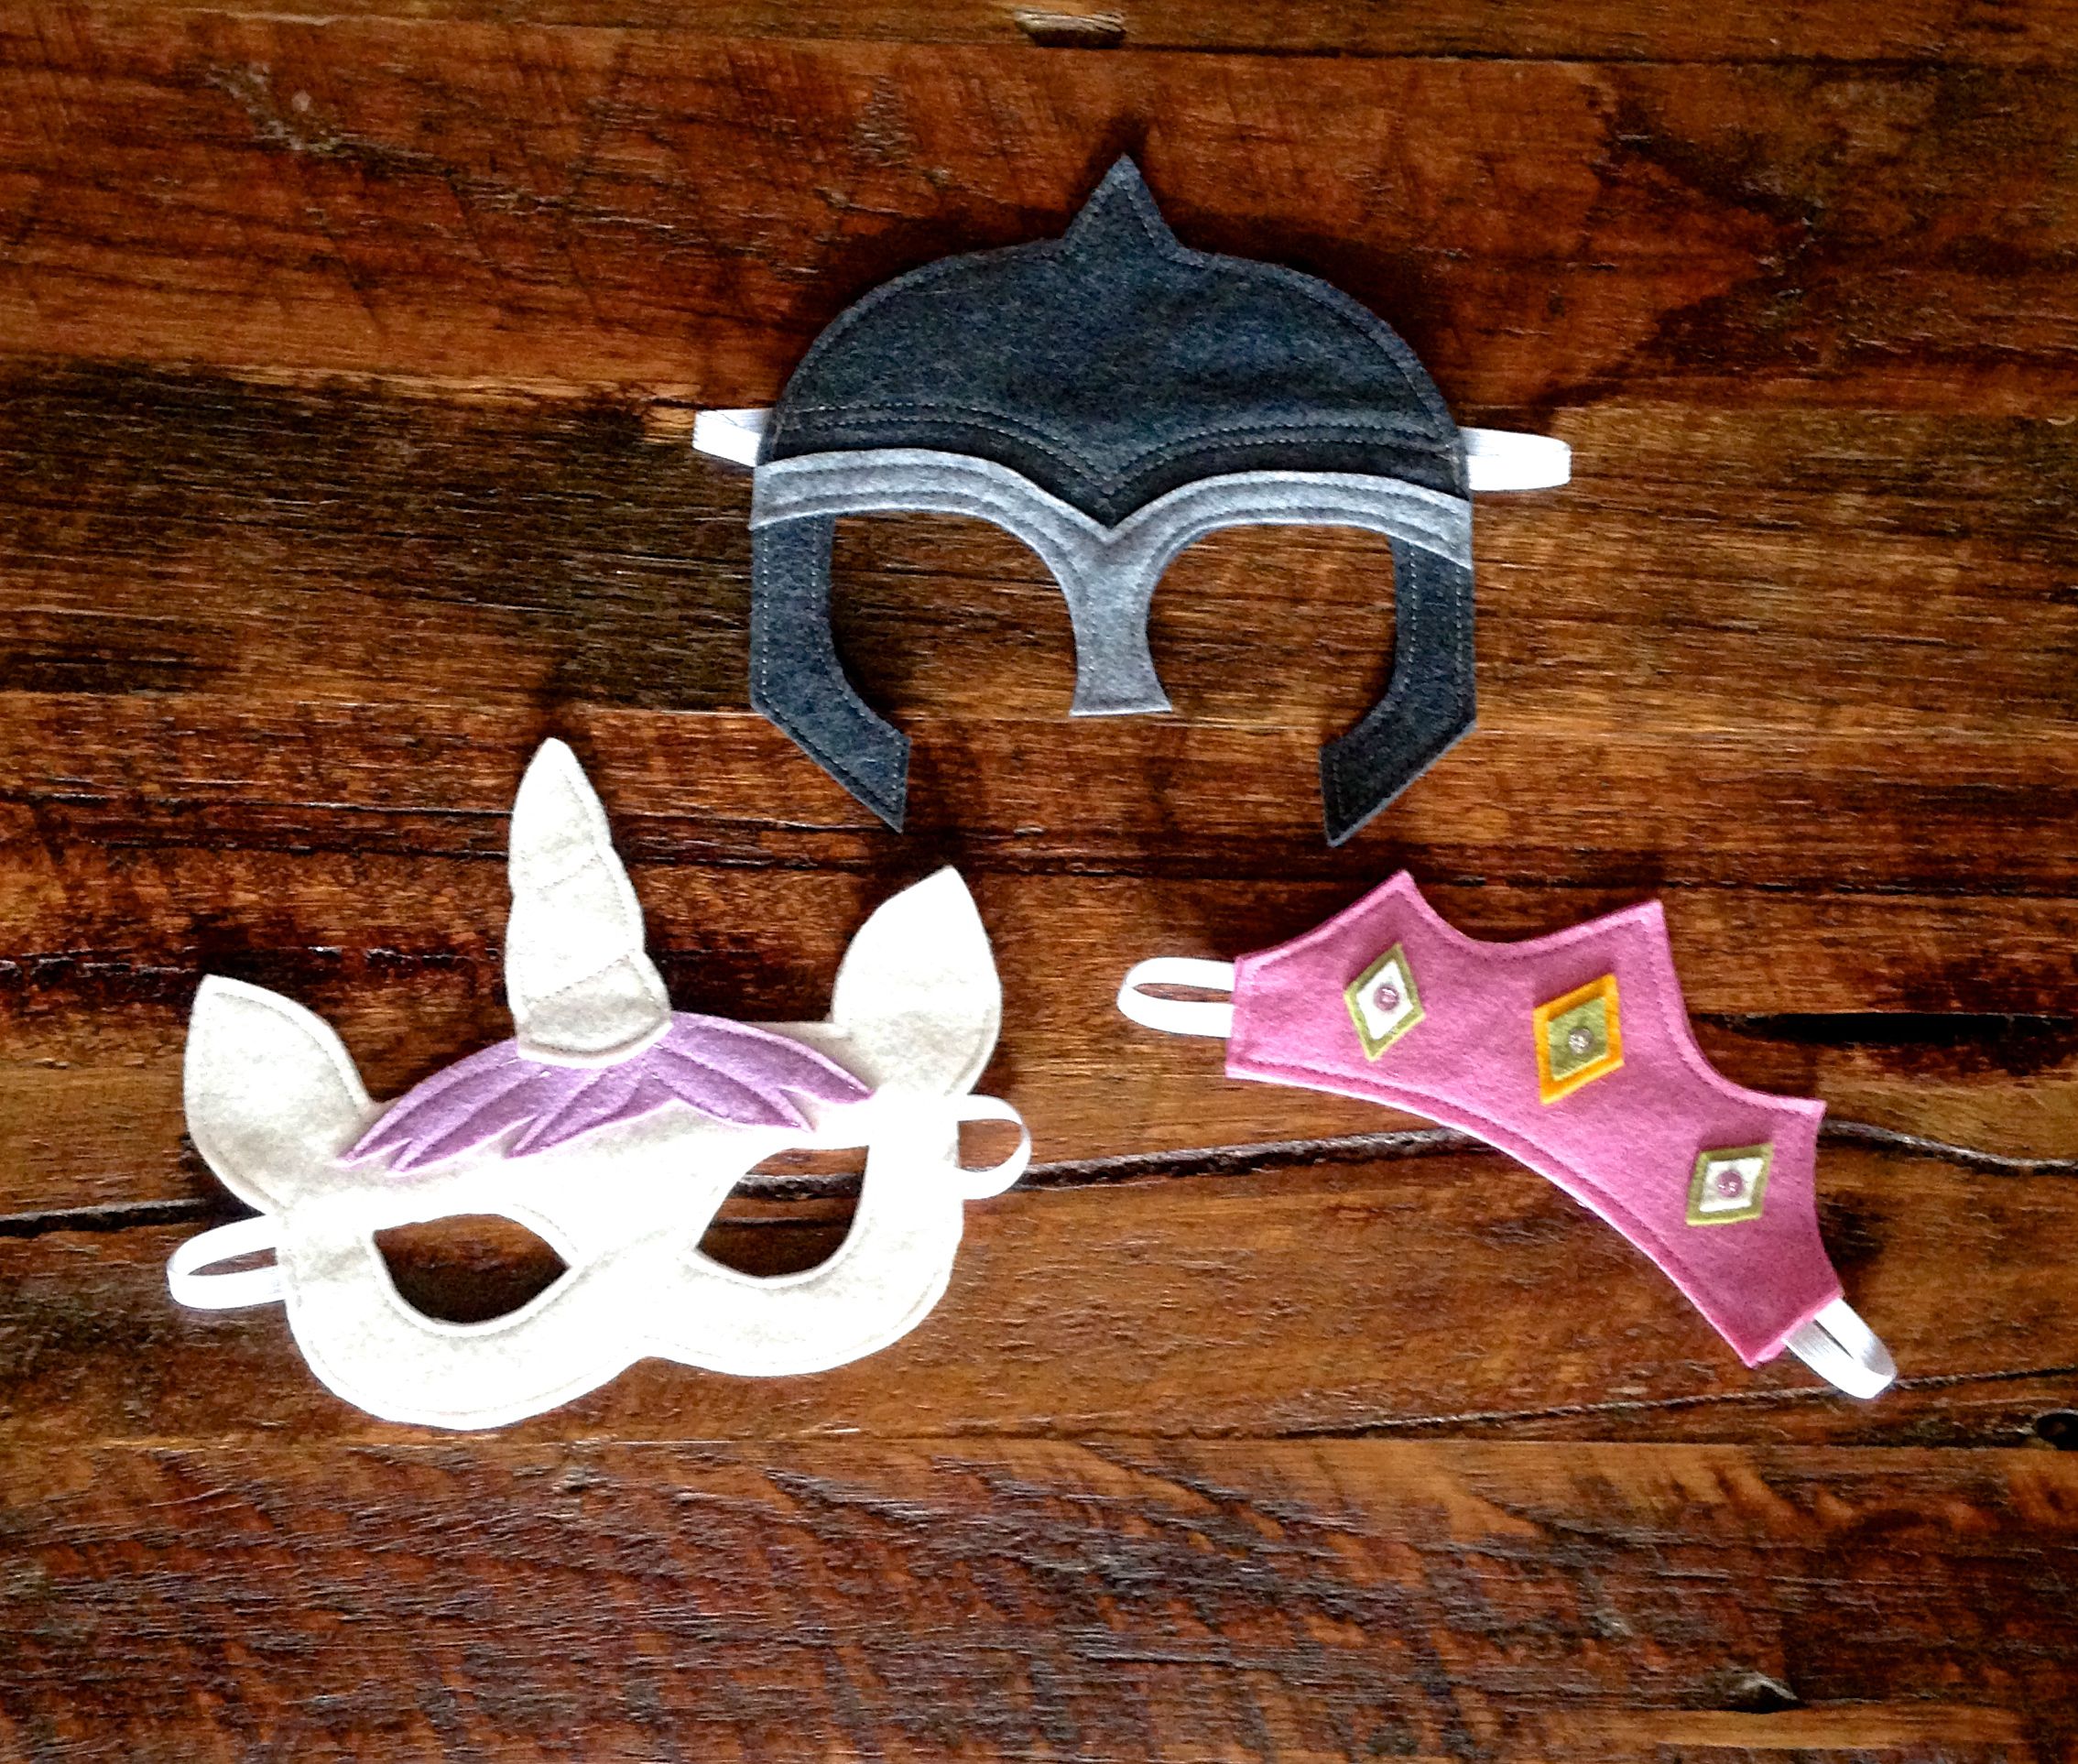
This really was a huge amount of work and while I have to say that I don’t really enjoy this type mass production there were definitely some interesting lessons that I learned while doing it:

Firstly, I need to accept offers of help more.  I don't know why but I usually turn down offers of help;  I suppose that I don’t want to impose on anyone or take advantage of their kindness so I try to do it all myself (and there may also be a tiny bit of stubbornness in there too!).  This time I was fully aware that I simply may not be able to do it all myself so I began to accept the offers. 

It made me feel enormously grateful to be surrounded by so many supportive and generous people. An activity that might, alone, have been tedious and stressful was turned into a pleasant way to spend an afternoon, particularly when you added in a cup of tea, a little cake and some happy chatting. (honestly - anything is bearable if you have tea and cake - don't you think?!)  There was also something surprisingly rewarding and soul nourishing about accepting the help; being able to admit that I needed it and finding that there were friends and family there ready and eager to offer it.  I suppose it's all related to our very human need for community and connection, but whatever the reason I was very touched so thank you so much to everyone who helped!

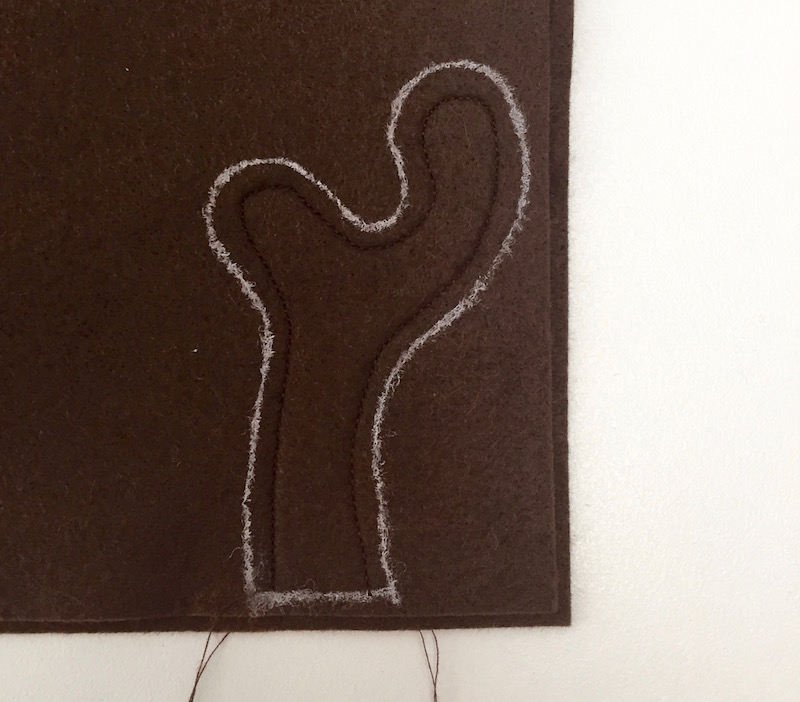
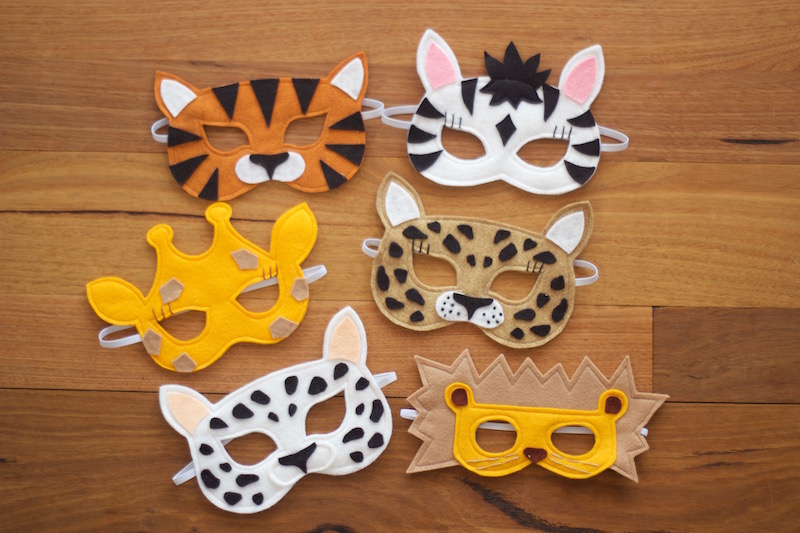
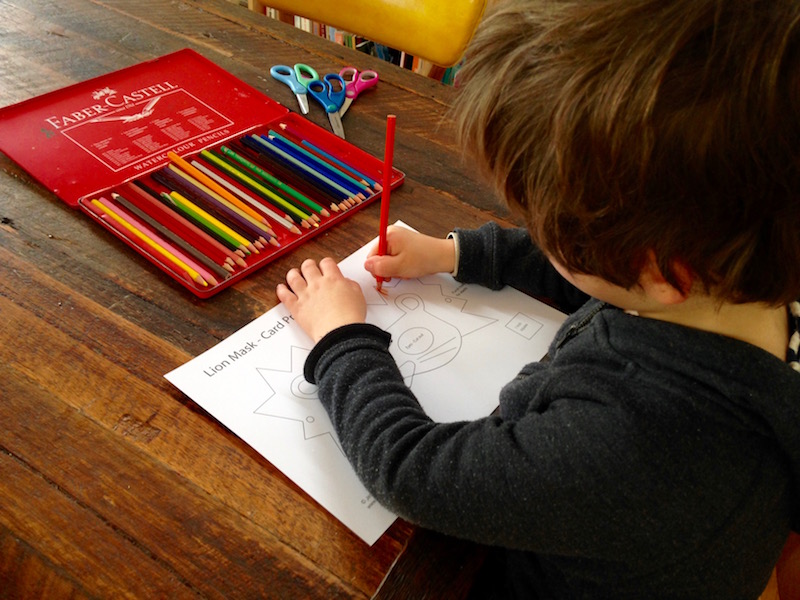
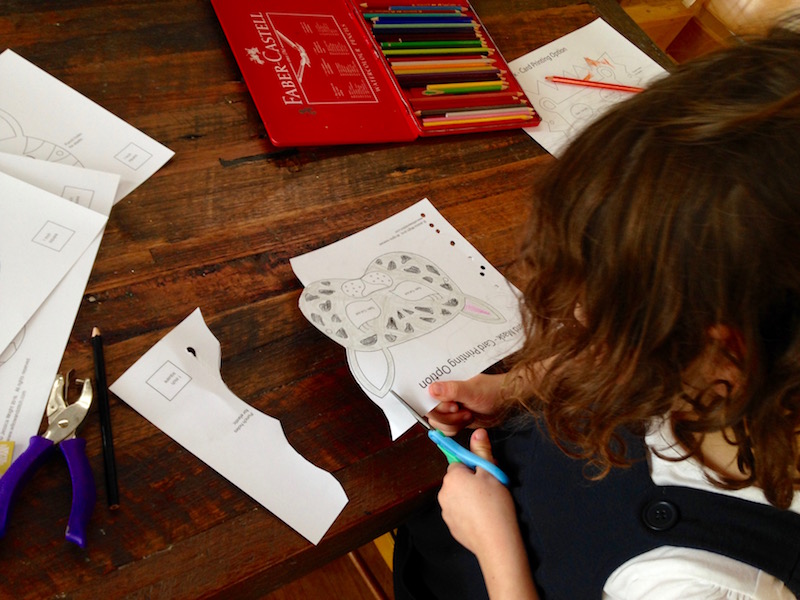
I also discovered lots of ways in which I can fine tune my making processes to find the most efficient way of doing things, for example I realised that sewing around the outline of the mask BEFORE I cut them out makes the whole process much quicker because I don’t have to deal with the double layers of felt shifting as I sew or cut.

I found here are a lot of hoops to jump through when you are selling to a large company, different people to talk to about different things, forms to fill in, barcodes to order and attach, accounts to set up, even using a courier service for the first time was a challenge!

Lastly, but probably most significantly, I realised that I have massively underpriced my products.  This is a bit of an uncomfortable thing to talk about, mostly because I feel a little like I'm standing here yelling 'I'm worth more than this!' but I did find it very interesting.  When I was contacted by the store they asked me what my wholesale price would be for a large quantity.  I had no idea!  I have obviously done some calculations to work out the cost of materials and my time for each mask and then added a bit of profit on top of that, although if I’m honest when I was setting the price originally I based it mostly on what I thought people would be willing to pay. As it turns out when I looked into it in more depth I realised I have been effectively selling masks at the wholesale price for the last year - oops!  

Exactly what, if anything, I'm going to do about this is going to require a little more thought but I'll come back and talk more about the whole thing once I've got it all straight in my head!

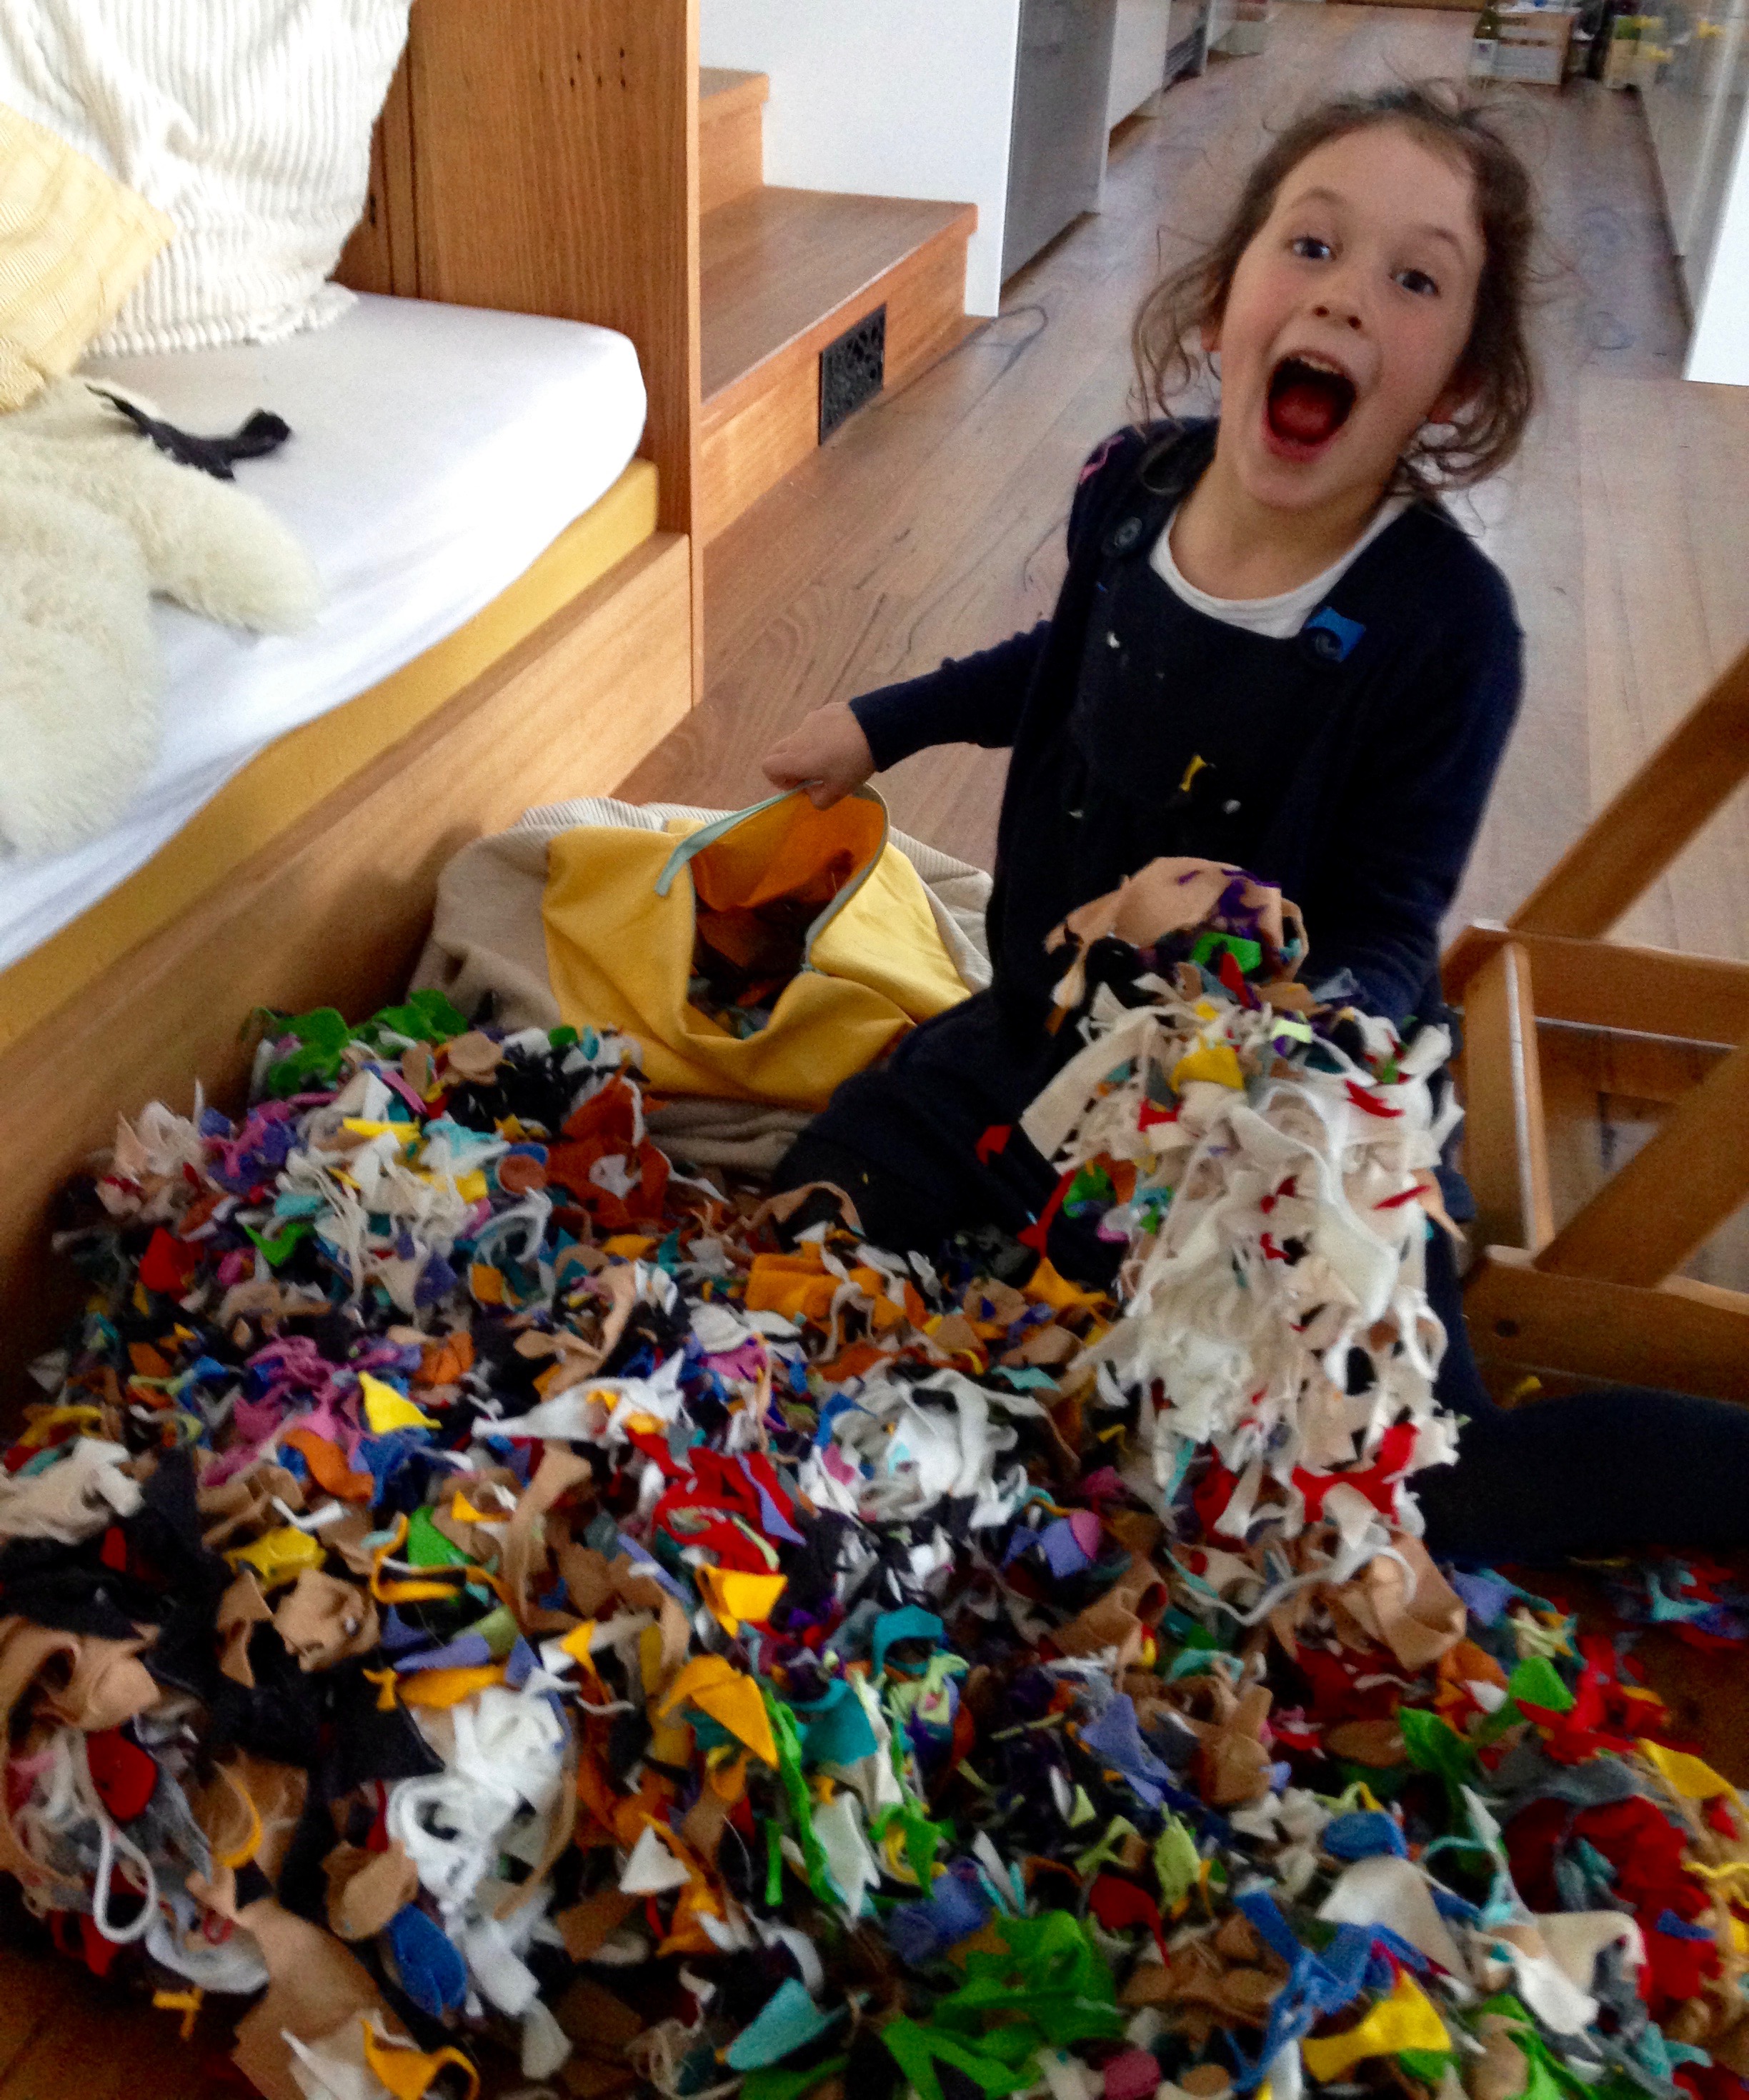
In the meantime here's a picture of a cute little monkey...

Goodnight!

You may also like...

Macrame Plant Hanger Goodness

Modern Macrame Plant Hanger

Oh my goodness.  I LOVE this latest project.  

This has been on my 'To Do' list for months now and I kept putting it off because it just seemed like such a big project, but funnily enough, when I actually got down to doing it it was done in an afternoon!  

It was probably a bit ridiculous to choose such a large project as my introduction to Macrame but I just fell in love with the design of it and have been looking for something to break up this massive expanse of blank wall in our new extension (which has 4.5 metre high ceilings!).  The pattern was an Etsy purchase from Boho Journal Shop and it was great.  Easy enough for a complete beginner to follow and I think the end result is just beautiful!  Besides, I've never been one to do things by halves....

Modern Macrame Plant Hanger / Wall Hanging

I can totally see myself getting addicted to making variations on this theme.  I need to build up my knotting repertoire, it so far consists of square knots in various forms and that's about it. Luckily I bought about 250 metres of rope so I should have enough to experiment with!

Sorry to those who know me - you're all getting a 70's Macrame plant hanger for Christmas, if anyone objects you'd better let me know in advance! 

Modern Macrame Plant Hanger / Wall Hanging

A Playtime Dress for Ella

Oliver + S Playtime Dress by Willow & Stitch

First make of Kids Clothes Week is complete!  I'm really happy with this lovely little dress.  The pattern is the Playtime Dress and leggings from Oliver + S.  I added these gorgeous little triangular leather elbow patches which I'm pretty sure I've seen somewhere (probably on Pinterest) and shamelessly copied, but I have no idea where I saw it!

Oliver + S Playtime Dress | By Willow & Stitch

The back view.  How cute are those elbows?!  And the gathers!  And the messy curls!

I really liked the topstitched peter pan collar, so much so that I'm almost wishing that I'd done it in more of contrasting colour - you almost can't see it!  (Also, don't judge me on my poor ironing skills...)

Oliver + S Playtime Dress | By Willow & Stitch
Love the silhouette of this dress..

Love the silhouette of this dress..

Molly (who has been renamed 'pillow' for some reason) came for a walk with us, as usual.  (Guess who had to carry her home though....)

Molly (who has been renamed 'pillow' for some reason) came for a walk with us, as usual.  (Guess who had to carry her home though....)

Both the dress and leggings were a big hit with the little lady.  Fortunately, because I cut into my precious Art Gallery Wanderer Knit for the leggings and would have been really annoyed if she hadn't liked them!  I actually cut them upside down (aagghh!) - I didn't realise the print was directional until I spotted those tiny little upside down horses.  So frustrating. Still, I'll probably be the only one who ever really notices!

I have pretty bad outfit envy with this one.  I also reeeeally want a pair of those gold toe capped shoes! 

I have pretty bad outfit envy with this one.  I also reeeeally want a pair of those gold toe capped shoes! 

Also, It's not technically a Kids Clothes Week make because I finished it last week but I finally got some nice pictures of the boy in his 'I solemnly swear I am up to no good' hoodie.  He refused to try it on for days, until I lost patience and practically wrestled him into it.  Once the tantrum was over he decided that actually he REALLY likes it. So much so that he has been sleeping in it and refusing to wear anything else.  Mama always knows best...!

Living up to the quote on his jumper!

Living up to the quote on his jumper!

I solemnly swear that I am up to no good | Harry potter quote stencilled sweater by Willow & Stitch

You May Also Like...

Wild Things - A New Safari Mask Sewing Pattern

Wild Things - Safari Felt Animal Mask PDF Sewing Pattern from Willow & Stitch

Are you ready for the kids to go totally wild?  Want to take a safari without ever leaving home?  Watch your backyard become the African savannah or turn the living room into a water hole with these lovely dress up masks.

This Wild Things Mask Sewing Pattern features patterns for Lion, Tiger, Giraffe, Zebra and Leopard masks.  You can even make the Leopard into a Snow Leopard for a mountain adventure. 

Wild Things - Leopard Felt Animal Mask PDF Sewing Pattern from Willow & Stitch

I'm so pleased with this pattern.  I think the designs are my favourites so far and I've put a lot of extra effort into the pattern and tutorials.  I've come up with a better (and easier) way of sewing the eye holes, and added whole sections explaining each technique used to make the masks.  There's information on how to resize them to fit dolls (or newborns), printing guides and notes on materials to use.

Wild Things - Snow Leopard Felt Animal Mask PDF Sewing Pattern from Willow & Stitch
Wild Things - Tiger Felt Animal Mask PDF Sewing Pattern from Willow & Stitch

The patterns are just as easy to follow as ever and are perfect for beginners.  They're quick to sew and make a perfect gift or stocking filler.  I think that practically all of the children Ella's class have gotten a couple of these masks for their birthday this year!  I had a particularly amusing / gratifying experience this last weekend when I took Ella to a 'Superheroes' party for one of her school friends (you can see pictures of her freezer paper stencilled Wonder Woman costume here) - I looked around the room and realised that about half of the kids were wearing masks that I had sewn and Ella had chosen to give to them for their birthday's.  It made me giggle and warmed my heart!

Wild Things - Lion and Zebra Felt Animal Mask PDF Sewing Pattern from Willow & Stitch

Anyway, back to these little wild things; we had so much fun shooting these pictures.  I can tell that these masks are going to get a lot of play time.  The leopard and snow leopard were particular favourites with my little testers. Anything that ROARs was a big hit too of course!  (Any excuse to make a lot of noise really!)

Roooooaaaar!

Roooooaaaar!

Wild Things - Giraffe Felt Animal Mask PDF Sewing Pattern from Willow & Stitch

As with all of my other PDF Mask Sewing Patterns this one contains bonus printables of all of the masks.  You can print these at home onto card then let the kids colour, paint or decorate them however they like.  Whey they're finished you simply cut them out and thread them with elastic.  It's one of our favourite rainy day activities and is also great as a birthday party craft activity.

Colour...

Colour...

Cut...

Cut...

Play!

Play!

To celebrate the pattern release, I'm offering free copies of not only this pattern but the ENTIRE collection of Willow & Stitch mask patterns to two lucky readers.  One here and one over on Instagram.  You are welcome to enter both giveaways as many times as you like.  Good luck!

Freezer Paper Stencilling

Freezer Paper Stencilling - Wonderwoman

Is it a bird?  Is it a plane?  No! It's Wonder Woman!  Someone is very pleased with my first efforts at Freezer Paper Stencilling!  Ella had a superhero party this weekend so we dug out one of the Wonder Woman headbands from my Etsy store stock, rustled up a blue star spangled skirt and jazzed up an old red T-Shirt by adding the Wonder Woman logo.

The Try Something New Every Month theme for July was 'Yarn' which I obviously didn't stick to.  I had intended to have a go at macrame but didn't manage to get organised in time so that's going to be next month's project instead - I've got grand plans for that one!

Instead I decided to have a go at Freezer paper stencilling which is one of those things that I have been meaning to try forever so it was great to finally have a reason to do it.  The freezer paper really is pretty amazing - which is fortunate really given how ridiculously difficult it is to get hold of here in Australia.  I had no luck in 3 of my local craft / fabric stores and then spent what felt like an eternity on the phone to another trying to get them to understand exactly what I wanted and then being passed from department to department while they tried to figure out whether they actually had any....  Still, we got there in the end and I bought a ton of it so that I hopefully never have to go through that palarver again!

Superheroes are very serious...

Superheroes are very serious...

Check out that awesomely wide gold elastic waistband - thanks Jimmy Buttons!

Check out that awesomely wide gold elastic waistband - thanks Jimmy Buttons!

Freezer Paper Stencilling - Wonderwoman

Having got the hang of Stencilling I decided to go for something wildly ambitious, because, well I'm ridiculous and I fell completely in love with this illustrated quote from Harry Potter by Rachel White Art. 

I spent about 2 hours cutting this one out and then managed to stuff it up in several different ways!  Firstly I melted my lovely merino wool while ironing on the freezer paper because I accidentally left my iron on very hot.  So, I had to try to peel the freezer paper off and reaffix it to a new piece (It took forever to cut out so I wasn't about to start again!) Consequently it didn't adhere quite as well as it should have and I got a little bleeding under the paper in places.

I solemnly swear I am up to no good hoodie - freezer paper stencilling

 I also used 3 coats of paint which was too much and made it really quite difficult to pull all the fiddly little bits around the letters off.  Still, I got there in the end!

The pattern was just a generic pullover pattern from an old Ottobre Magazine which I modified to give sleeve cuffs and a waistband because, well, frankly I'm too lazy to be bothered with using the twin needle on my sewing machine to hem it!  I also added a hood (arguably to avoid having to do the neck binding) but also because I really wanted to have a hood on it.

I can't help but think that this one was more for me than for the boy, but I did think the quote was very apt for such a cheeky little monkey!  Being the cheeky monkey that he is however, the little toad refused flat out to put it on.  This is his standard approach to jumpers at the moment but he usually comes up with some meandering excuse like 'I  don't like red, I only like blue' or 'I don't want to wear it if it used to be so and so's' (the vast majority of his clothes are hand-me-downs). It was partly this which led me to make him a jumper in the first place - my logic being that if I made something especially for him, in a colour that i know he likes, he surely won't have any problems with wearing it, right?

WRONG.

What I failed to take into account with all my well applied logic, was that my darling 4 year old exists beyond the realms of reason, in a world where 'I don't want to try it on now, I want to try it on next Wednesday' is a perfectly valid argument and no amount of persuasion, bribery or threatening is going to change his mind.  So.  Here are some pretty flatlay photos for you.... I give up, I'm going to throw myself on the sofa and watch Outlander.  Good night. xx

I solemnly swear I am up to no good hoodie - freezer paper stencilling

You May Also Like...

Making Flower Crowns - and a Fairy Birthday Party

Handmade Flower Crowns

I've been dying to have a go at making these gorgeous flower crowns ever since I saw Siobahn Rogers' beautiful crowns on instagram.  So, when my big girl announced that she wanted a Fairy party for her 6th Birthday it seemed like a good opportunity to give them a go. 

Handmade Flower Crowns

Given that it's the middle of winter here I didn't have a massive choice of flowers at the market, but I managed to find some pretty pinks and yellows and some lovely native Australian greenery to go with them.

I didn't think that Ella's party guests' attention would stretch to making the crowns from scratch so I wanted to prepare as much of it as possible in advance.  There is a great tutorial here on Siobhan's website.  I bent the wires into shape and made loops at the ends through which they could be fastened with ribbon and I trimmed all the stems and arranged the flowers into little bunches so that the girls could choose 5 or 6 to wind onto their crowns. (This was the point at which I began to regret the whole exercise...!)  Anyway, finally, about 2 hours later I had enough bunches for all of our little fairy friends to make a themselves a crown.  

Handmade Flower Crowns

We even had a few bunches left over which I popped onto the top of the birthday cake.  I'm going to be doing this for every little (and big!) girl's birthday cake from now on.  It was quite incredible - the cake went from being very ordinary to amazingly special in about 10 seconds flat!

Just put a flower on it.

Just put a flower on it.

A happy little Birthday Fairy in her Flower Crown.

A happy little Birthday Fairy in her Flower Crown.

As one of the party games we had about 50 balloons which we filled with confetti and silver stars. We gave each of the children a pin and let them go nuts.  Literally.  It was complete madness.  The balloons lasted about 10 seconds, vanishing in an explosion of pops, bangs, glitter, confetti and delighted squeals.  

Confetti Filled Balloons

I had thought I might get some cute photos of children being showered in confetti.  Wrong. What I actually got was 10 seconds of insanity.  When I looked up from comforting the poor kid in the corner who turned out to be terrified of balloons popping, all that remained was a few shrivelled pieces of rubber and an almighty mess.

Confetti Filled Balloons - the aftermath
One of our little fairy's handmade birthday presents - her very own fairy garden.

One of our little fairy's handmade birthday presents - her very own fairy garden.

I really loved this project, it made me wish I was 6 years old so that I could run around wearing flower crowns every day. We'll definitely be making these again, particularly now that I have all the supplies, perhaps we'll go for a nature walk and try making one out of wildflowers next time.

Handmade Flower Crowns

You May Also Like...

English Paper Piecing - A Scrap Busting TSNEM Project

English Paper Piecing - A scrap busting Try Something New Every Month Project

Ok, so it might be halfway through June but here is my May 'Try Something New Every Month' project.  The theme for this month was 'handwork' and in a rare fit of compliance I decided to go with it and have a go at English Paper Piecing.  

I'm going to blame my tardiness on a combination of technical issues (my cloud is full which apparently doesn't make it rain but does make it hard to get photos off your phone and onto your computer.... I know - Yawn! Sorry!...), the glacially slow progress of my hand sewing and the fact that I had lots of other (frankly more interesting and instantly gratifying) projects to sew.

English Paper Piecing - A scrap busting Try Something New Every Month Project

This was, first and foremost, a scrap busting project.  I seem to be incapable of throwing away even small scraps fabric and thought that this would be a great way to use some of them up.  I genuinely thought that I was starting small with this project - it was the first time that I'd tried English Paper Piecing so it made sense to keep it small and simple right?  The theory was good, but unfortunately it takes a LOT of 1" hexies to make even a rather small piece - I mean just LOOK at that pile of cardboard templates! 

English Paper Piecing - A scrap busting Try Something New Every Month Project

I was pretty pleased with my final patchwork, but it still wasn't nearly big enough and I didn't fancy taking the rest of the year to complete this so I went and sewed a big yellow boarder around it before hand quilting the top sewing it into a footstool. 

English Paper Piecing - A scrap busting Try Something New Every Month Project

Just don't look too closely at my hexies please or you'll see the wonky joins and gaps.  You know how you hear quilting people say 'nice points!'? No one is ever going to say that to me.....

English Paper Piecing - A scrap busting Try Something New Every Month Project

Once I had my footstool cover it needed stuffing (and this is the really brilliant scrap busting part) it's also the part where you begin to think that I might actually be crazy.. BUT.  If you've been here before, or follow me on Instagram, you'll know that I spend a lot of my 'free' time sewing up felt dress up masks which I sell on Etsy and at local handmade markets in Melbourne.  Anyway, the point is that cutting out all of those felt masks results in lots of tiny scraps which I don't seem to be able to throw away.  I'm honestly not sure why I didn't just put them in the bin except for that I had vague, half-formed ideas about using them to stuff a pillow or something at some point.  So; this is what a year's worth of scraps looks like (and how a 5 year old looks when you let her tip them all over the dining room floor and roll around in them):

https://www.etsy.com/au/shop/Stitchandwillow?ref=hdr_shop_menu&section_id=16893907

And this is how my paper pieced, felt scrap filled, labour of love footstool looks when finished. I'll admit to feeling a little smug, If only because I actually finished the thing!  I'm not sure I'll do any more English Paper Piecing, at least not in the near future, but despite all my grumbling I did rather enjoy this (possibly because I gave me an excuse to sit on the sofa and plow through another season of Mad Men!)

English Paper Piecing - A scrap busting Try Something New Every Month Project

Right.  Time to get cracking with June's TSNEM project!

You May Also Like...